As we embrace the future of renewable energy, solar panels stand at the forefront of this green revolution. You’ve come to the right place if you’re considering harnessing the sun’s power to reduce environmental impact and energy costs. In this informative guide, we will take you on a step-by-step journey through the intricacies of solar panel mounting, ensuring that you have the knowledge and confidence to make the most of this sustainable energy source.
Solar panels offer a compelling blend of eco-friendliness and cost-efficiency. They not only minimize your carbon footprint by emitting zero pollutants but also provide electricity for free, allowing you to enjoy substantial long-term savings on your energy bills. Best of all, you won’t need to jump through hoops for official permissions, and with the UK’s abundant sunlight, you can rely on a consistent and renewable energy source. Join us as we explore the various aspects of solar panel mounting, including mounting types, installation processes, and essential maintenance tips. By the end of this guide, you’ll be well-equipped to embark on your solar journey, making a smart investment in a cleaner and more sustainable future.
Contents
- 1 Key Takeaways
- 2 Benefits of Getting a Solar Panel
- 3 Choosing an Appropriate Location for the Panel
- 4 Types of Mounts
- 5 How to Interconnect Solar Panels?
- 6 Process of Installation
- 7 Maintenance of Solar Panels
- 8 Case Study: Implementing Efficient Solar Panel Mounting for a Residential Property
- 9 Expert Insights From Our Solar Panel Installers About Solar Panel Mounting
- 10 Discover the Power of Solar with Solar Panels Network
- 11 Final Thoughts
Key Takeaways
- Solar panels offer eco-friendly and cost-efficient energy solutions, reducing carbon footprints and long-term energy expenses.
- The location and mounting type are crucial for solar panel efficiency, with options including roof, ground, and wall mount systems.
- The installation involves scaffolding setup, mounting system installation, wiring, inverter connection, and regular maintenance for optimal performance.
Benefits of Getting a Solar Panel
Solar panels are a revolution in the field of renewable energy. Here are some reasons why you must install solar panels at the earliest.
Eco-friendly
Solar panels emit zero pollutants. Thus, using solar panels minimises the effects of climate change on the environment and reduces your carbon footprint.
Cost-efficient
Any electricity that you produce using solar panels is entirely free. This allows you to use as much energy as you want without paying any additional costs. It can power your home or business for free, thus saving cash in the long run by cutting down on energy bills.
No Permission Required
You don’t need any official permission to install a solar panel. You need to comply with a set of simple rules.
Renewable
In the UK, you will get plenty of sunlight all year. Since the sun isn’t running out of sunlight anytime soon, you can generate and use as much power as you want without worrying about exhaustion.
Choosing an Appropriate Location for the Panel
Solar energy panels’ placement mainly depends on the tilt and azimuth (orientation) angles. The tilt angle depends on the latitude of your location. Other than this, the orientation is important and specific to the installation you opt for.

Types of Mounts
While the location is integral to the solar panel installation, the mounting type determines the system’s efficiency. This section talks about the two types of mounting.
Roof Mount Systems
Roof Mount is a popular choice globally because it is cost-efficient and saves space. However, even though they save space, they are not very flexible. The system has to be placed on the restricted space available on the roof.
Other obstructive factors include chimneys, antennas, vents, and so on, reducing the space on the roof. Therefore, it cannot be claimed that roof mounting is the most optimum choice.
There are two types of roofs, so you need to know how the solar panel will fit on yours.
- For sloped roofs: A railed system must be installed on sloped roofs. This includes attaching rails on the roof to keep the solar modules in place. Flashings are attached to rafter locations, providing more robust structural support.
- For flat roofs: A system of ballasted rocks is used to hold the system to the floor. The flat mounting racking system is usually installed at an angle between 5-30 degrees, depending upon its type.
Ground Mount Systems
Ground mounts are not restricted, provided you have enough space in your lawn or backyard. These systems can be comfortably placed at the correct tilt and orientation angles, maximising the efficiency of the solar panels.
Wall Mount Systems
Wall-mounted solar panels are a type of solar panel mounted on the wall of a building, typically on a south-facing wall.
Note where you place the solar panel must not be covered with much shade.
How to Interconnect Solar Panels?
Once the system layout is in place, including the number of panels connected in a string and the number of strings to be installed, you can move to connect solar panels.
You can comfortably connect two or more solar panels by using the MC4 connectors. Generally, solar panels are connected in series, and then the string wires are directly connected to the inverter. However, they can also be connected in parallel or a combination of series/parallel using connectors.
The solar panel connections must be handled with utmost care. This is because they continuously receive sunlight and have an open circuit voltage waiting for something to close the circuit’s path.
Process of Installation
This section deals with a step-wise breakdown of the process of installation of solar panels. The following are the steps to install a solar panel on your roof.
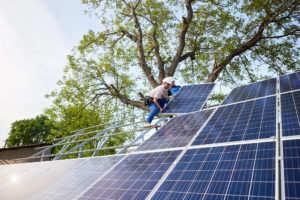
- Step 1: You must install scaffolding first to ensure safety during the primary installation process on the roof.
- Step 2: Next, the solar panel mounting system has to be installed. This will support the solar panels. To maximise exposure to sunlight, the mount must be set up at an angle of 18-36 degrees.
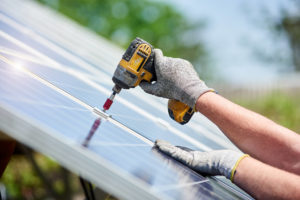
- Step 3: Next, the solar panel is installed on the mounting structure. Ensure all the nuts and bolts are in place to provide maximum support.
- Step 4: A critical step is wiring. This is done using MC4 connectors to connect solar panel strings. These are used since they are suitable for all types of panels. As a safety measure, shut down all house power supplies while connecting.
- Step 5: Connect the solar inverter to the system. The solar inverter can be placed indoors or outdoors, depending on the location of the main panel. The inverter’s efficiency is higher when in a cool, shady place.
- Step 6: The next step is to connect the solar inverter with the solar battery. A solar battery is placed to ensure an uninterrupted energy supply on cloudy days. It also affects and decreases costs during solar panel installation.
- Step 7: Now, you need to connect the inverter to the consumer unit. A meter and a monitor must be installed to measure the electricity generated. A computer or laptop can easily check the solar system’s performance.
- Step 8: Finally, start and test the solar panels.
The solar panel installation process is complete.

Maintenance of Solar Panels
Installation is just the first step of generating power using a solar panel. Its maintenance is very crucial, and one must not neglect it. Luckily, solar panels require negligible maintenance.
However, you must check your solar panels once every year to see if dirt or other things are piled up on the panel. Nothing should be blocking them from absorbing the sun’s heat.
Consult the experts regarding any warranty constraints about self-cleaning. You can even take the help of a cleaning company to do the cleaning for you.
Additionally, it would be best to get your solar panel system checked by the installer every 4-6 years.
Case Study: Implementing Efficient Solar Panel Mounting for a Residential Property
Background
A family in the South West of England decided to install a solar panel system to reduce their energy bills and carbon footprint. The property featured a combination of flat and pitched roofs, along with a spacious garden, providing multiple mounting options. The primary goal was to maximise the system’s efficiency by choosing the optimal mounting solutions while ensuring a seamless integration with the home’s aesthetic.
Project Overview
The project involved assessing the property to determine the best locations for the solar panels and selecting the appropriate mounting systems. The installation aimed to balance energy generation with the homeowner’s budget and aesthetic preferences.
Implementation
- Site Assessment: Our team conducted a thorough site assessment to evaluate shading, roof angles, and available ground space. We used solar modelling tools to simulate the sun’s path and identified potential shading issues from nearby trees and buildings.
- Mounting System Selection: Given the mixed roof structure and the availability of garden space, we recommended a combination of roof-mounted and ground-mounted systems:
- Roof-Mounted System: For the pitched roof sections, we used a railed system with adjustable tilt angles to optimise exposure to sunlight. The panels were positioned to avoid shading from chimneys and ensure easy access for maintenance.
- Ground-Mounted System: The flat garden space allowed for a ground-mounted system with a fixed tilt angle designed for maximum year-round energy capture. This system provided additional capacity and was easy to install and maintain.
- Installation: The installation began with the setup of scaffolding and safety measures. The roof-mounted panels were installed using high-quality, corrosion-resistant materials, ensuring durability. The ground-mounted panels were installed on a sturdy framework anchored securely to withstand wind and other environmental factors.
- Wiring and Inverter Connection: The systems were connected using MC4 connectors, and the solar inverters were installed in a shaded, well-ventilated area to enhance efficiency and lifespan. The inverters were linked to the home’s electrical system, with a monitoring system set up for real-time energy tracking.
- Final Inspection and Commissioning: After installation, we conducted a thorough inspection to ensure all components were correctly installed and functioning. The system was then commissioned, and the homeowners were guided on monitoring the system’s performance.
Results
- Enhanced Energy Production: The combination of roof and ground-mounted systems maximised the home’s solar energy capture, meeting the family’s energy needs and significantly reducing their electricity bills.
- Aesthetic Integration: The project successfully integrated the solar panels into the property’s design, maintaining the home’s aesthetic appeal while providing substantial environmental benefits.
- Long-Term Reliability: The use of durable materials and proper installation techniques ensured that the mounting systems would require minimal maintenance and provide long-term stability and performance.
- Environmental Impact: By switching to solar energy, the family significantly reduced their carbon footprint, contributing positively to their local environment and supporting broader sustainability goals.
Summary
This case study highlights the importance of selecting the right mounting systems for solar panel installations. By carefully assessing the site and choosing appropriate solutions, the project achieved optimal energy generation and aesthetic harmony. At Solar Panels Network, we are dedicated to providing tailored solutions that meet our clients’ unique needs, ensuring their transition to solar energy is smooth and beneficial. This project showcases our expertise in designing and implementing efficient solar panel systems that deliver long-term value.
Expert Insights From Our Solar Panel Installers About Solar Panel Mounting
Choosing the right mounting system is crucial for the efficiency and longevity of your solar panel installation. Roof-mounted systems are popular for their space-saving design, but they require careful planning to avoid shading from chimneys or nearby structures. Ground-mounted systems, on the other hand, offer more flexibility in panel placement and tilt angles, maximising energy capture.
Senior Solar Installer
It’s essential to ensure that the mounting structure is robust and properly installed, as this supports the panels and withstands environmental factors like wind and snow loads. Proper installation not only secures the panels but also optimises their exposure to sunlight, crucial for achieving maximum efficiency.
Renewable Energy Consultant
Regular maintenance and inspection of the mounting system are as important as the panels themselves. Over time, mounts can loosen, or corrosion can set in, especially in coastal areas. Ensuring that the mounts are in good condition can prevent damage to the panels and maintain the system’s overall performance.
Lead Solar Technician
Discover the Power of Solar with Solar Panels Network
Are you navigating the world of solar installations? Look no further than Solar Panels Network, the UK’s trusted partner in harnessing the sun’s potential. Our dedication goes beyond just installations; we’re on a mission to transform how homeowners and businesses across the UK perceive and utilise energy. By choosing us, you’re reducing your carbon footprint and making a smart financial move that promises savings for years ahead. Contact us today and embark on your solar journey.
Final Thoughts
Solar energy is by far the most cost-efficient and environment-friendly source of energy. Hence, if you’re thinking about getting one installed, don’t think much. It is an investment and will reap benefits for generations to come.
This solar panel mounting guide discusses different components of getting a solar panel mounted and successfully installed. Take the first step towards an energy-efficient future and install your solar panel system as soon as possible.
About the Author
Solar Panels Network stands at the forefront of solar energy solutions, driven by a team of seasoned solar engineers and energy consultants. With over decades of experience in delivering high-quality solar installations and maintenance, we are committed to promoting sustainable energy through customer-centric, tailored solutions. Our articles reflect this commitment, crafted collaboratively by experts to provide accurate, up-to-date insights into solar technology, ensuring our readers are well-informed and empowered in their solar energy decisions.

